Texture Styles are part of T-Shirt Design Master Collection 2.
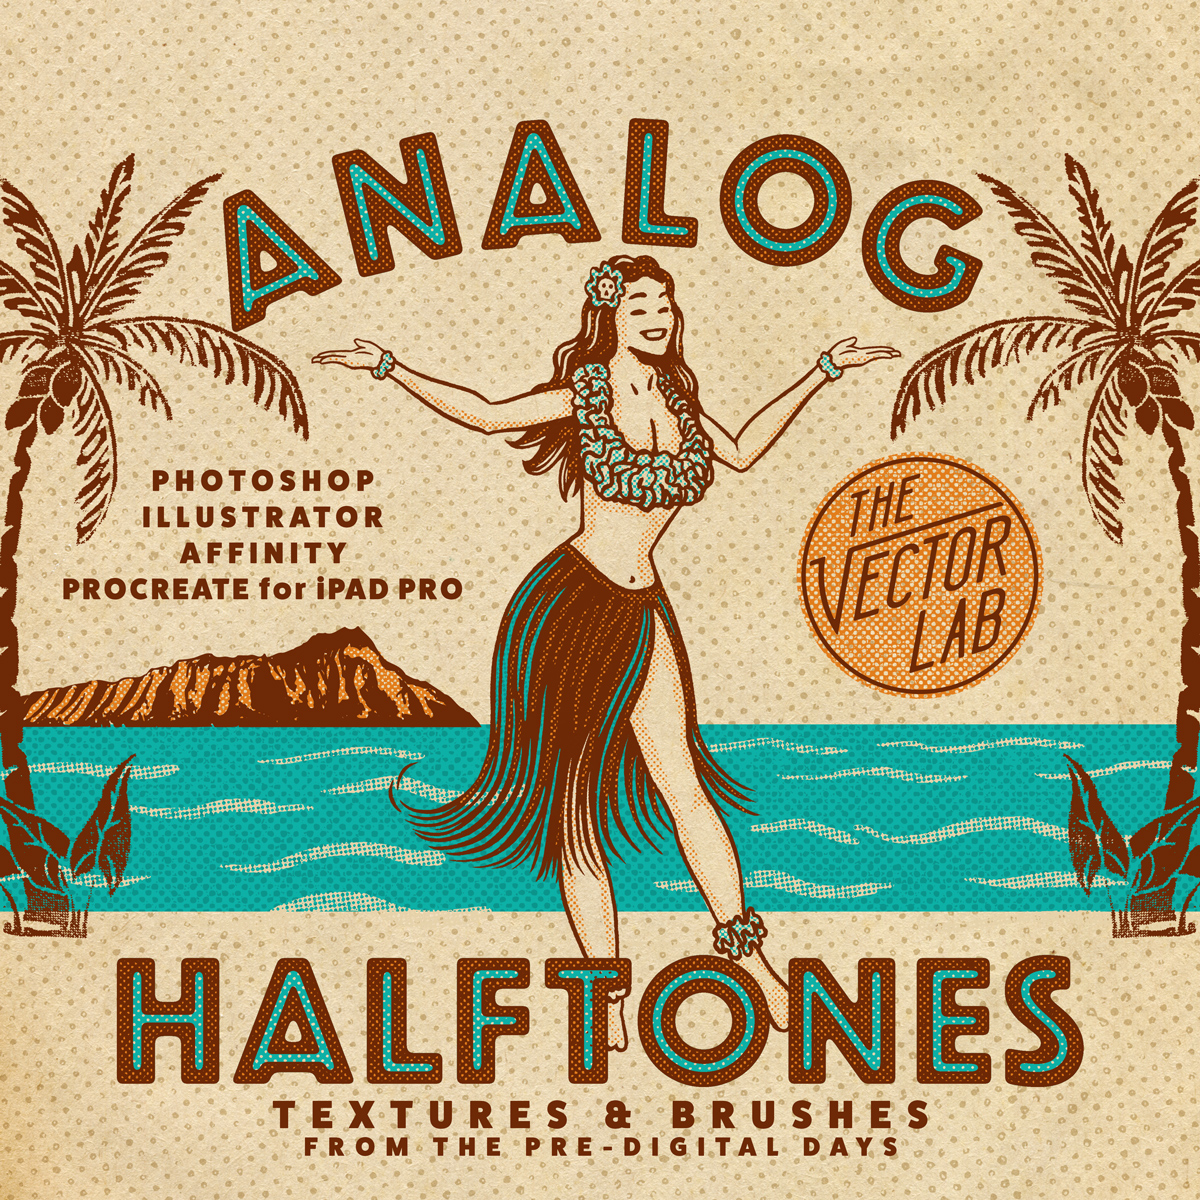
Analog Halftones
A collection of 42 Analog Halftone brushes, textures, and patterns from the mid-1960's - created the old-school way.
Analog Halftones will work with anything you can dream up in Photoshop, Illustrator, Procreate App for iPad Pro, Affinity Designer & Photo.


Top 4 Resources inside T-Shirt Design Master Collection
The T-Shirt Design Master Collection is my largest bundle of t-shirt design resources: 64 t-shirt mockup templates, 605 textures for Photoshop and Illustrator, 25 logo templates, as well as T-Shirt Design Workshops 1 & 2.
My favorite resources are:
4) Ink Stamp Automator for Photoshop
Just copy & paste your design into this template to apply an instant ink stamp effect. Perfect for adding some interest to otherwise plain & simple logos or lettering.
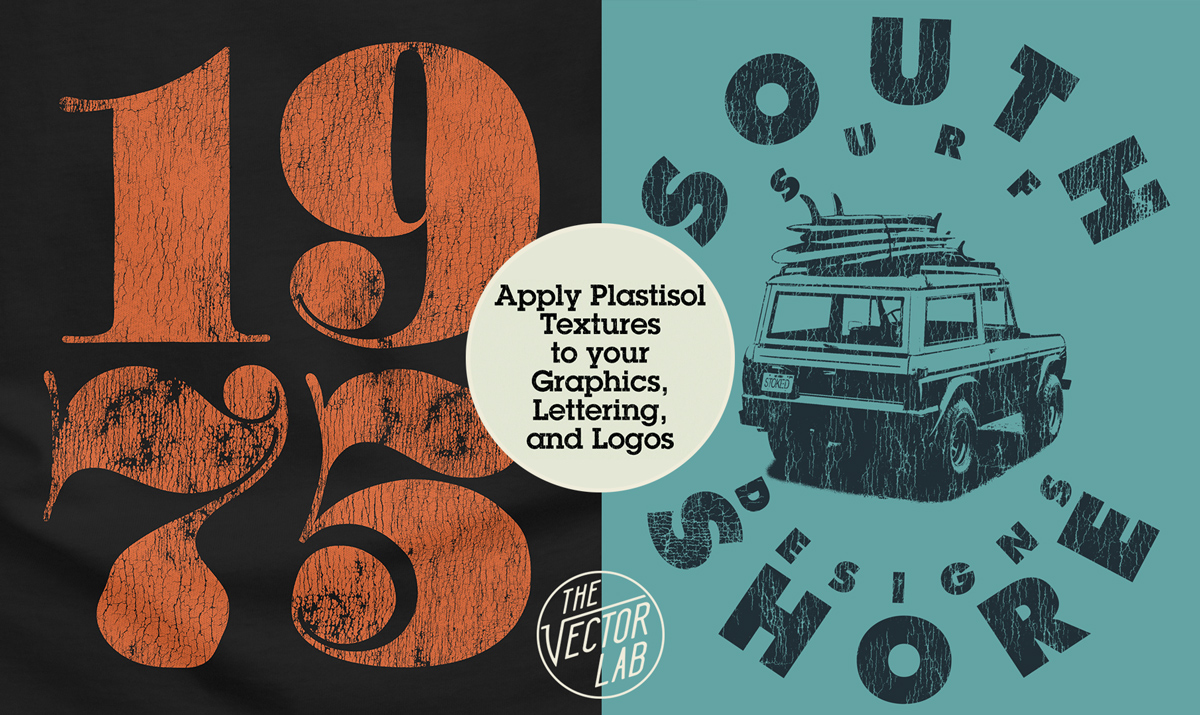
3) Plastisol 1 & Plastisol 2 Vintage T-Shirt Textures
These cracked ink "Plastisol" textures will make your t-shirt graphics look washed & worn like and old vintage tee. Plastisol textures are ideal to add a "thrift shop" look to your real-life t-shirt screen print designs, as well as your digital portfolio. Photoshop and Illustrator compatible.
2) Men's T-Shirt Mockup Templates & Women's T-Shirt Mockup Templates
Making your t-shirt designs look real is the best way to show your designs before sending them off to be printed. These templates will help your clients and customers visualize your designs. You can even change the fabric color, add a custom neck label, and warp your graphic to match the wrinkles in the fabric. These templates are formatted for Photoshop and Illustrator, but also work with CorelDraw and Affinity Designer & Affinity Photo.
1) T-Shirt Design Workshop 1 & T-Shirt Design Workshop 2
Learn how to design a t-shirt like a pro. More than 3.5 hours of t-shirt design theory & instruction
Tutorial: Add Texture to Graphics in Adobe Illustrator - The #1 Method
This video shows how to use Opacity Masks in Adobe Illustrator to add texture to your t-shirt designs, logos, and lettering. It also covers how to export your design as a transparent PNG, which is a preferred file format for Direct-to-Garment (DTG) printing, Print-on-Demand (POD), and Amazon Merch.
Resources discussed
In case you missed it, here's a video showing how to use textures, layer masks, and brushes in Adobe Photoshop.
Tutorial: How to add Texture to Designs in Photoshop
Use Photoshop brushes and Layer Masks to add texture to T-Shirt Designs, Logos, and Lettering.
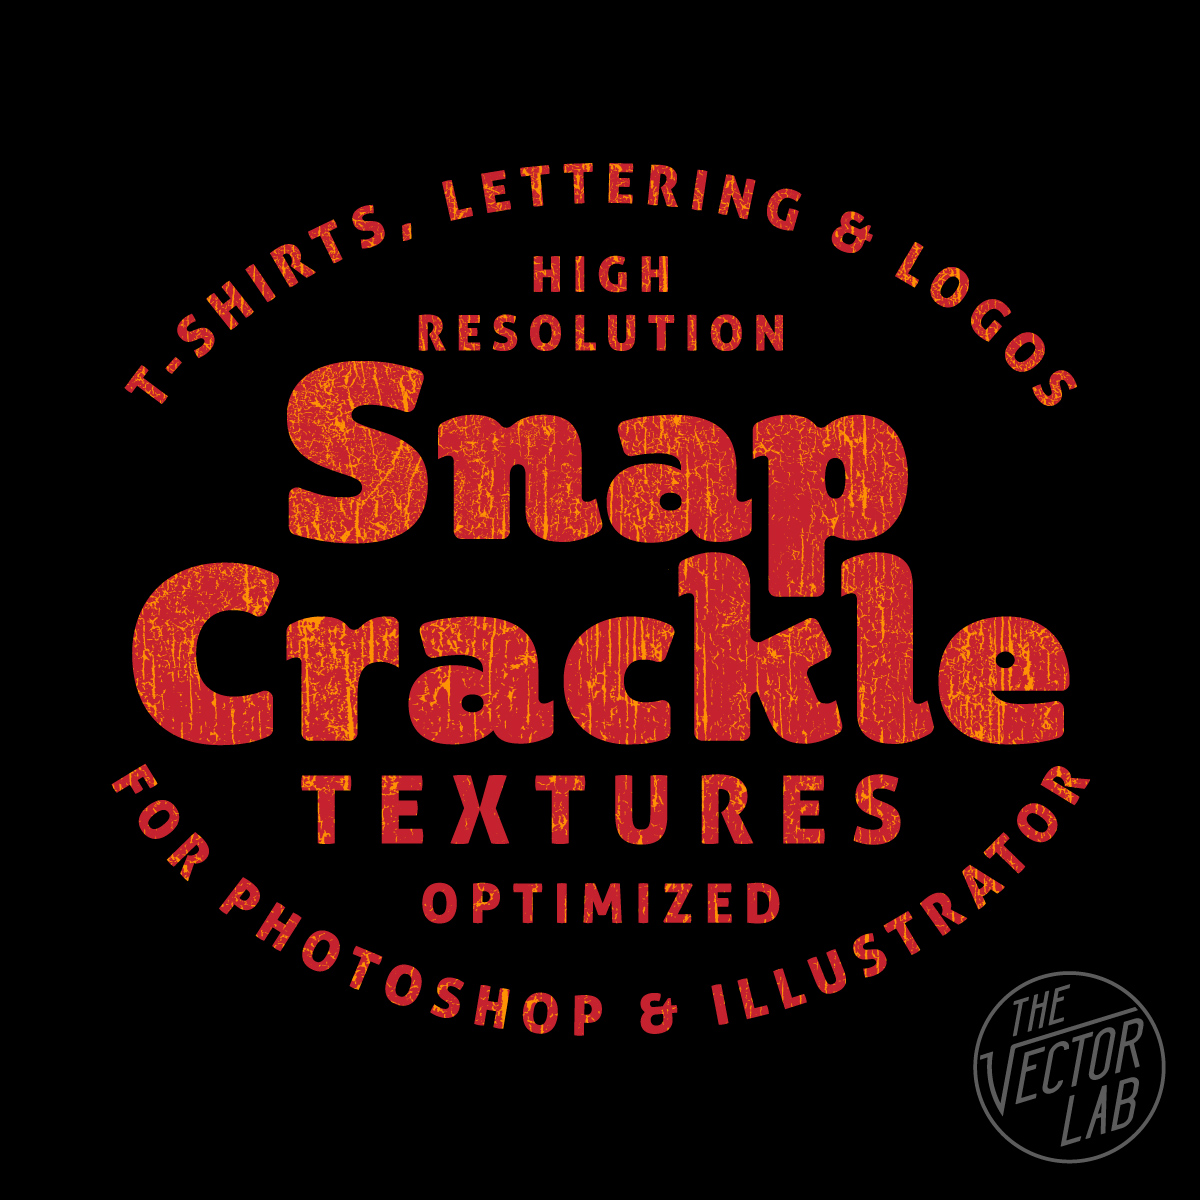
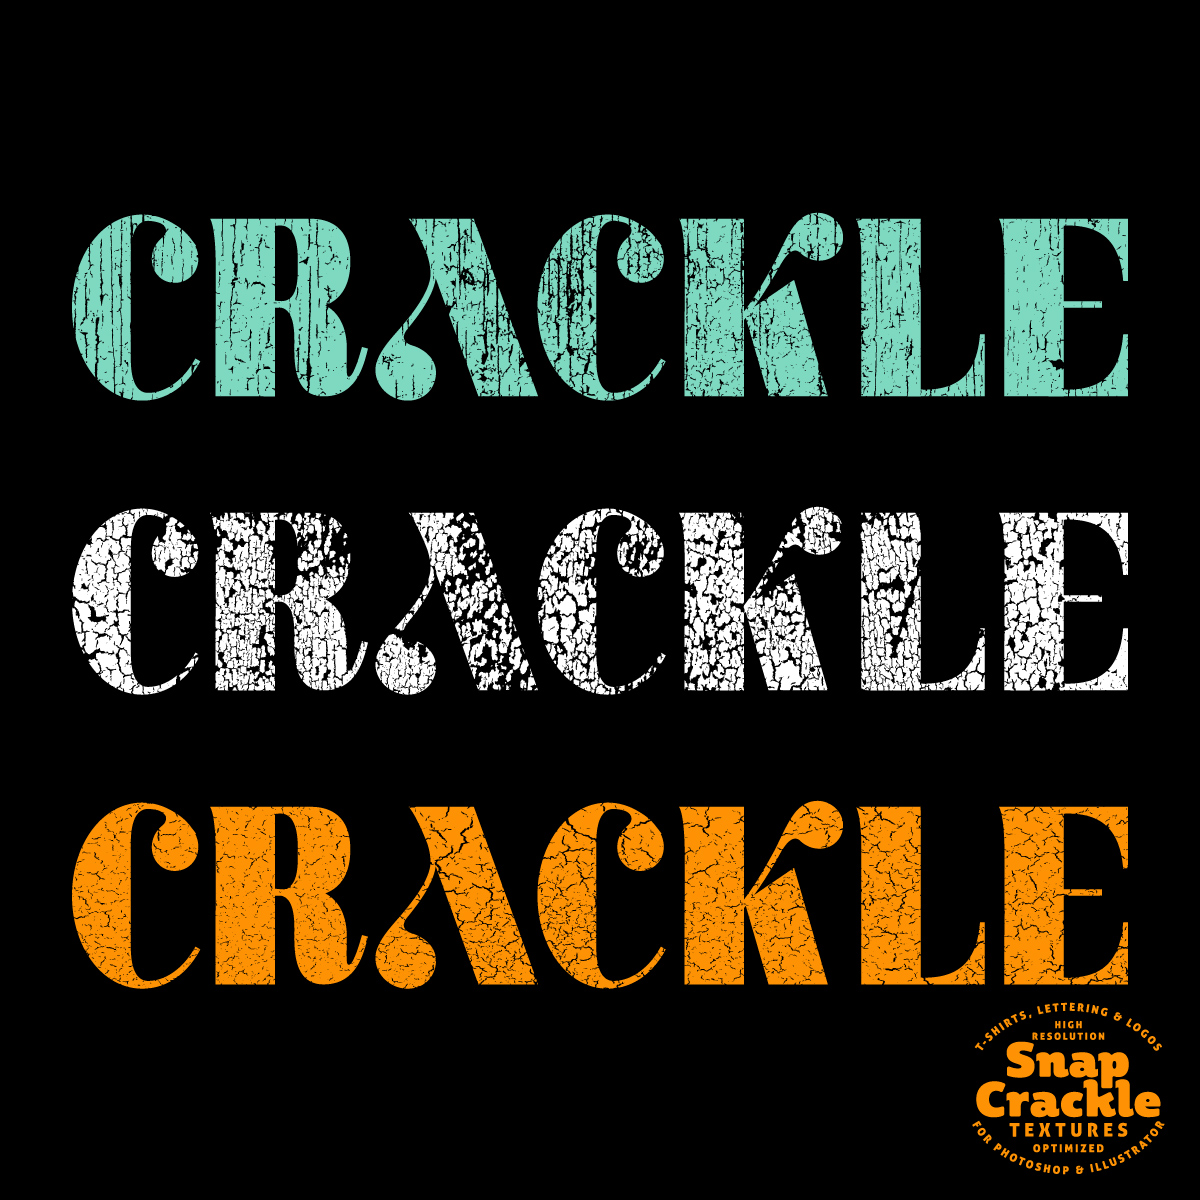
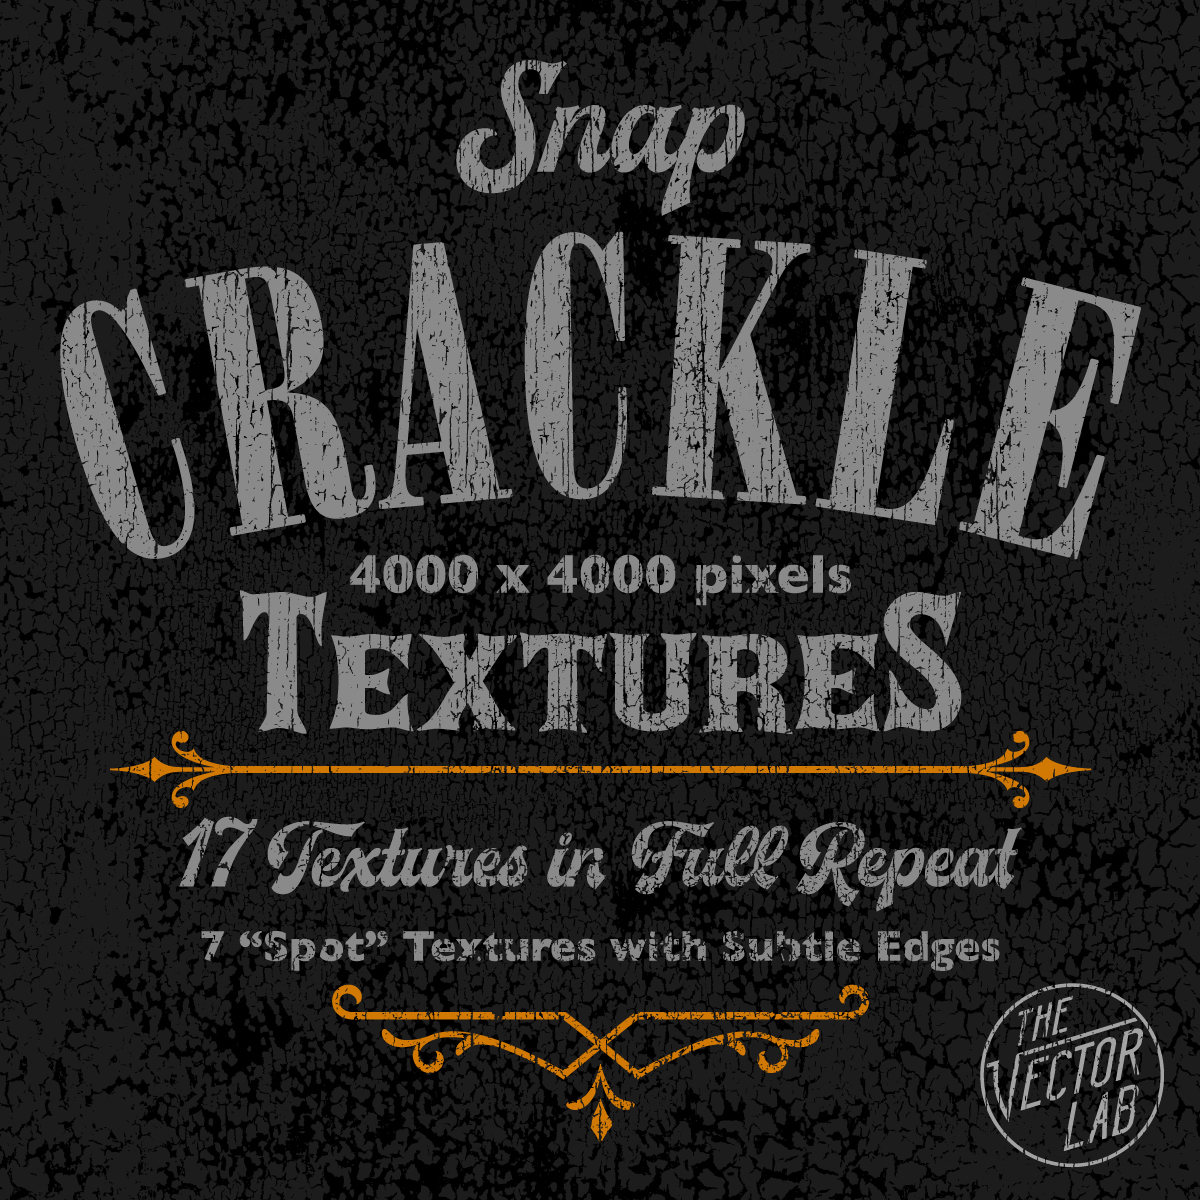
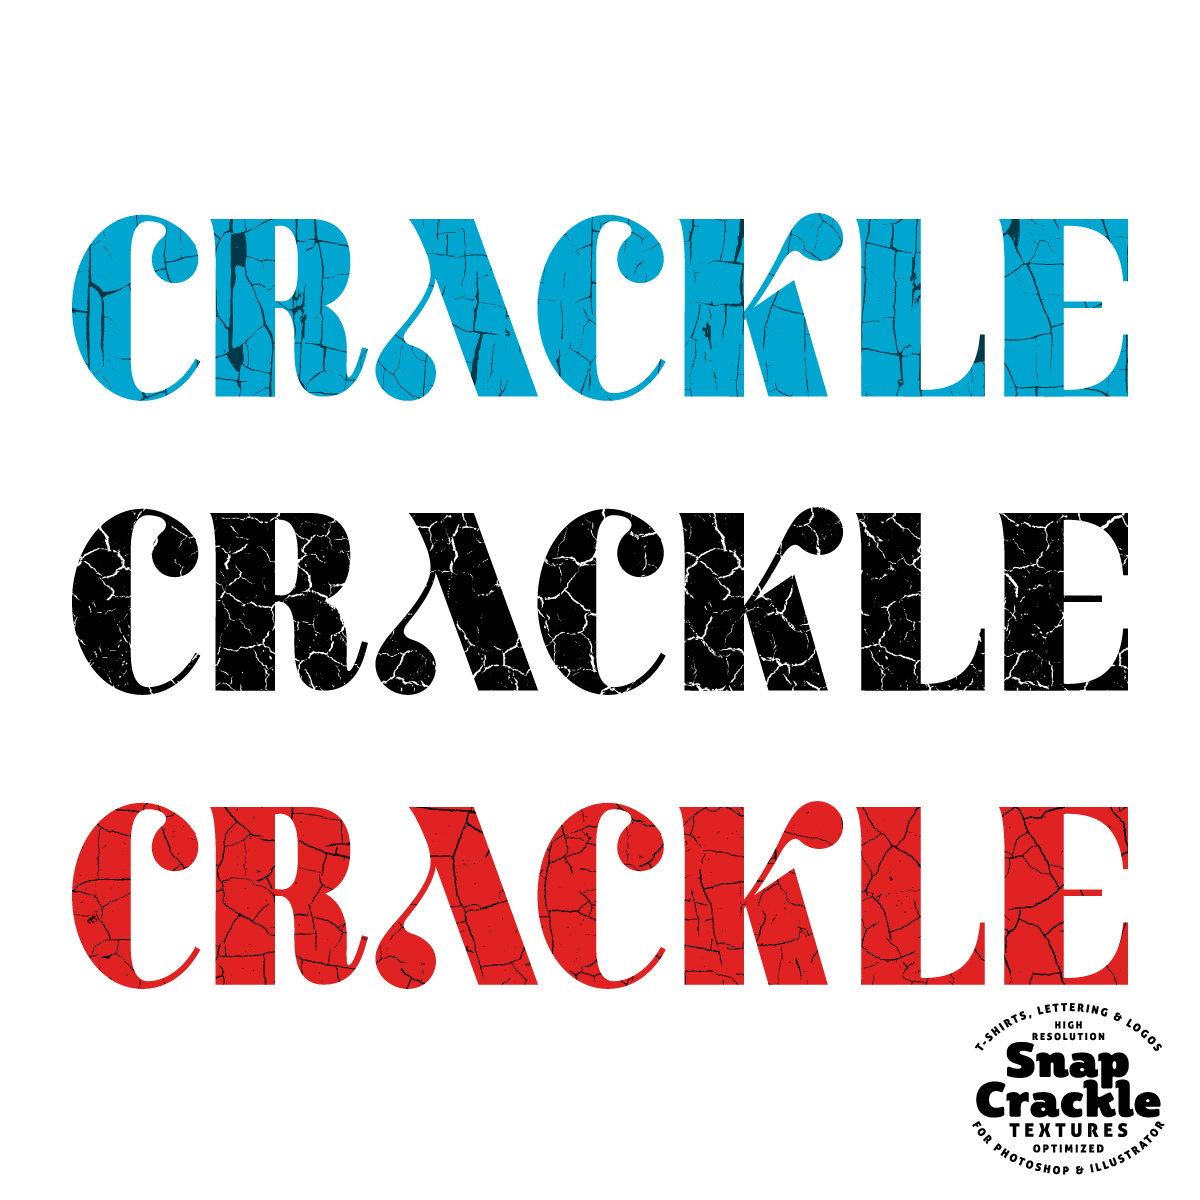
Snap Crackle Textures for Photoshop & Illustrator
A set of 31 vintage cracked paint textures that will give your designs a weathered and rustic look.
Snap Crackle Textures is sourced from antique cracked paint surfaces like old signs, walls, and furniture.
This is just what your t-shirt designs, logos, lettering, and illustrations need for that added element of interest.
Optimized for Photoshop and Illustrator, these textures will also work in virtually any other graphic design software package.
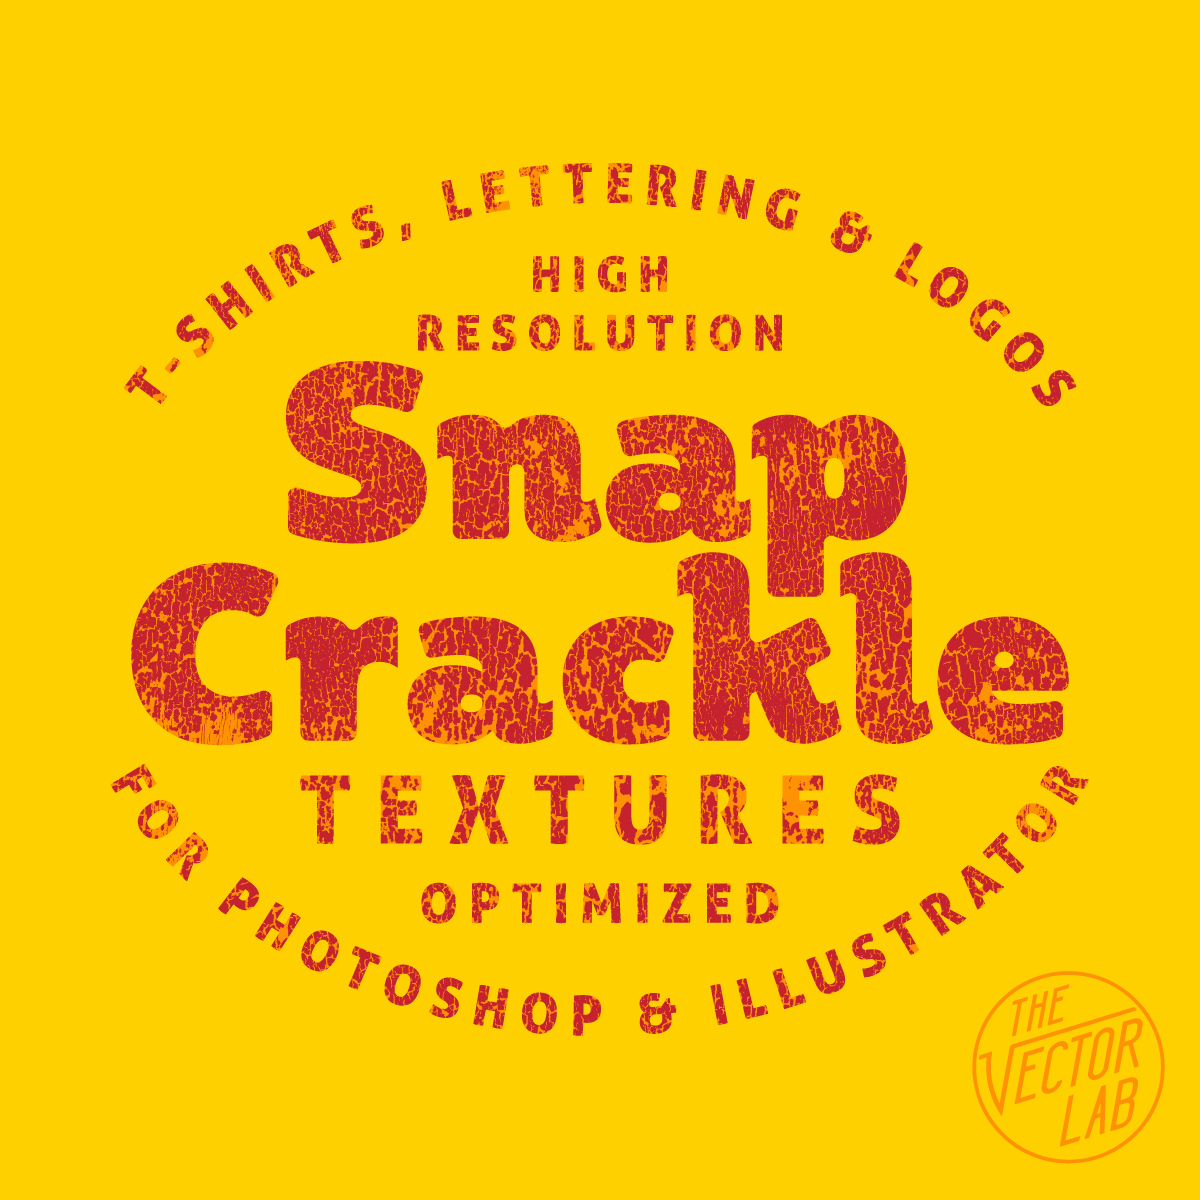
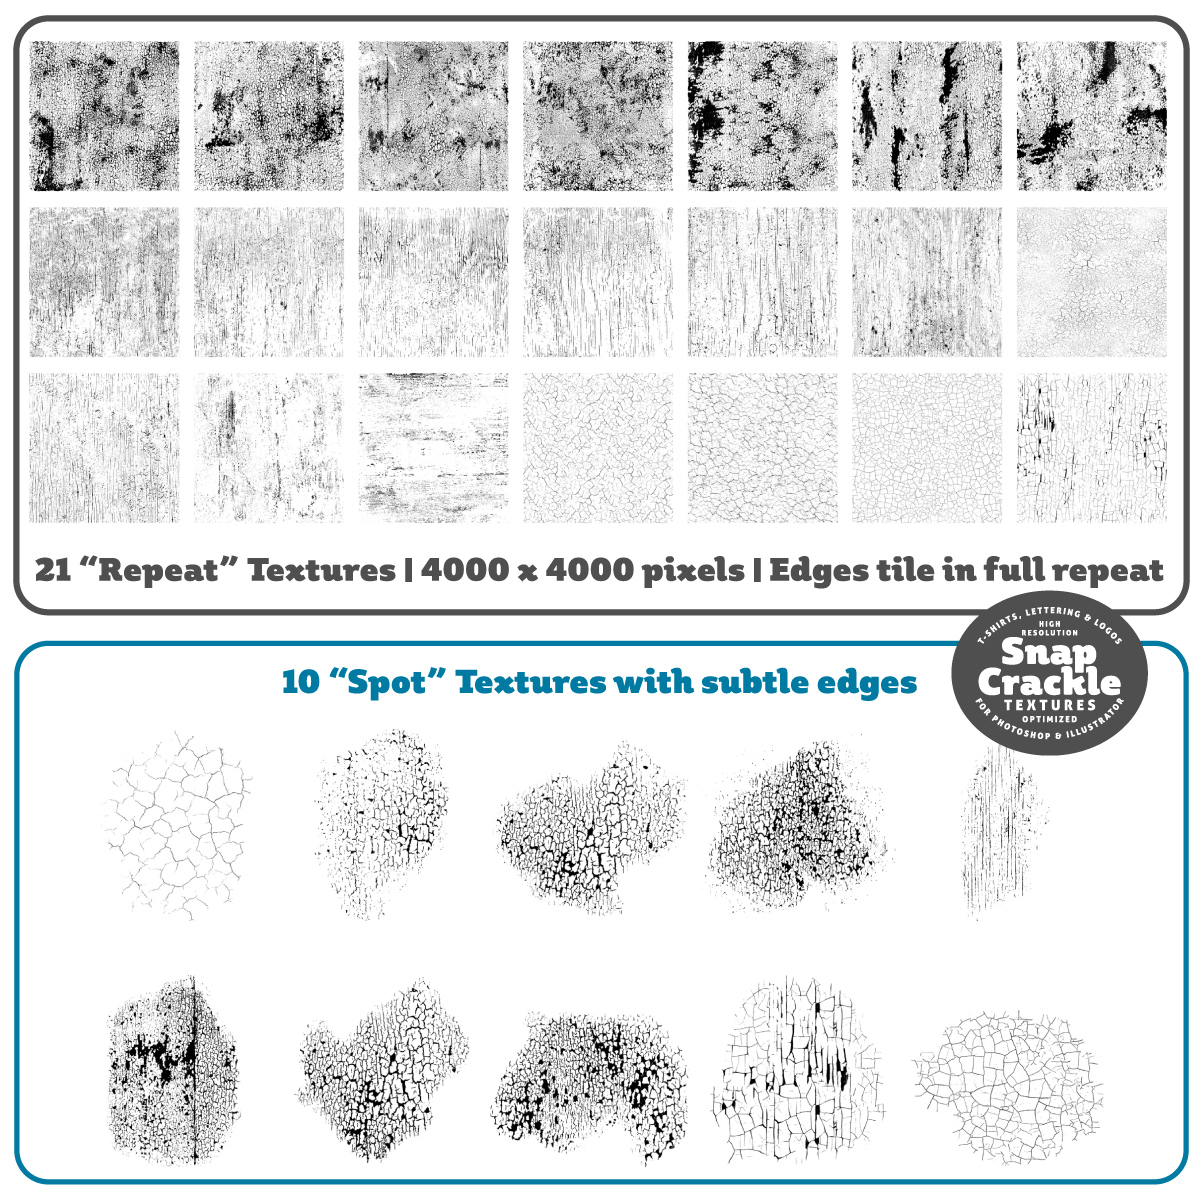
What's included:
- 21 "Repeat" textures in Bitmap TIFF, Layered TIFF, and Photoshop Brush format. (4000 x 4000 pixels). Each texture is in seamless repeat (tileable top-to-bottom and side-to-side), so you can use them to texture ANY size graphic.
- 10 "Spot" textures with subtle edges in Bitmap TIFF, Layered TIFF, and Photoshop Brush format. These textures are good for applying texture in specific areas.
Halftone Automator
Halftone Automator (a "smart PSD" template for Photoshop) will add vintage-style halftone effects to your designs, logos, and typography.
This template takes plain designs and instantly knocks a transparent halftone pattern right through your design.

How Halftone Automator Works:
1) Just paste in your Pixel or Vector design to the designated Smart Object layer.
2) Choose from 47 different halftone patterns, then you are done!
What's included:
The Halftone Automator Photoshop PSD template (4000 x 4000 pixels).
47 built-in halftone patterns with various dot sizes and density.
Quick Start Guide PDF instructions.
The effect works best if you paste in a design that is on a transparent background. See video with tips on how to adjust the halftone effect that is applied.
Ink Stamp Automator
Recently, I created a new texture template for Photoshop to save time applying texture to logos, lettering, and t-shirt designs. It's something I've been using in my own freelance design work. And it’s a big time saver.
This new template is called the Ink Stamp Automator.
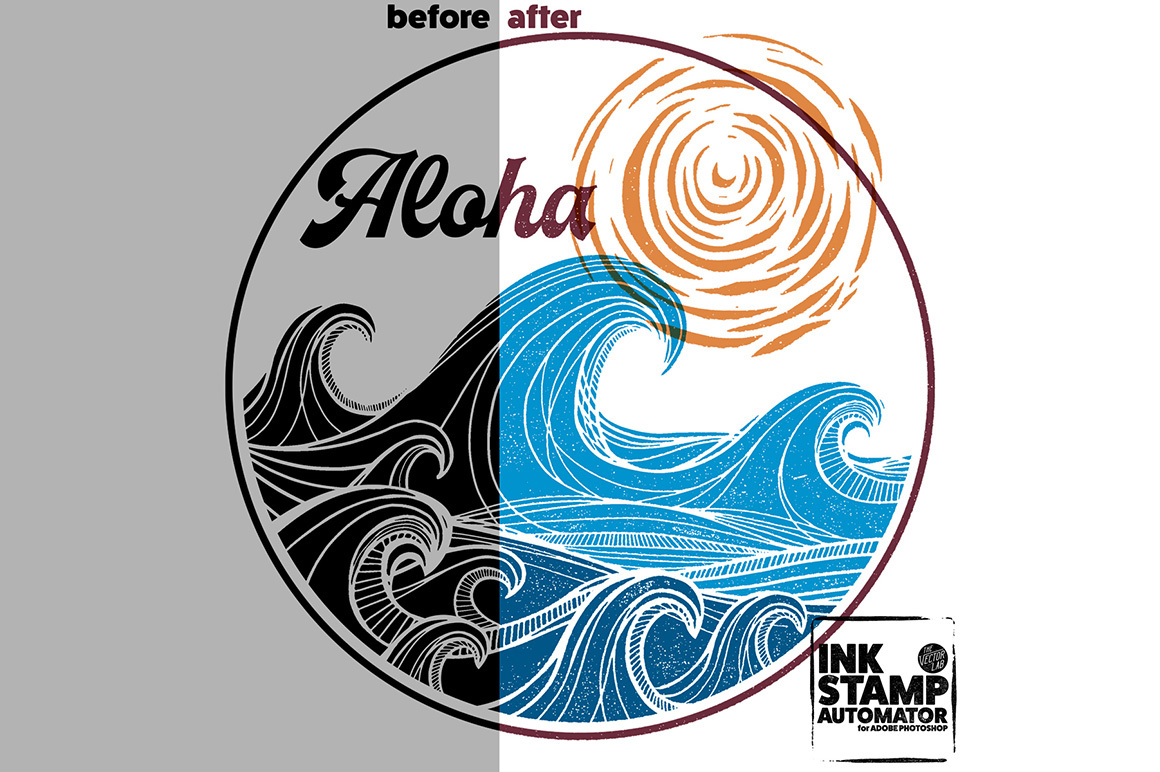
This template allows you to apply an instant Ink Stamp (or woodblock / linocut print) look to your designs in Photoshop.
Even if you aren't specifically looking for an ink stamp look, it's a great way to add some interest and texture to your designs.
Go here to see some examples of what you can do:

How Ink Stamp Automator Works:
1) Just paste in your Pixel or Vector design to the designated Smart Object layer.
2) Choose from 42 different ink stamp textures, then you are done!
What's included:
The Ink Stamp Automator Photoshop PSD template (4000 x 4000 pixels). 42 built in textures.
Quick Start Guide PDF instructions.
9 Ink Stamp Shapes. These are ink stamp circles, squares, and rectangles that will help you create logo shapes (see video).
42 stand alone ink stamp textures in LAYERED TIFF format (4000 x 4000 pixels). Perfect for power users who want to dig in and fine-tune the textures.
42 stand alone ink stamp textures in BITMAP TIFF format (12,000 x 12,000 pixels). These are great for designers who want to use the textures in Adobe Illustrator.
Top 4 Ways to Add Texture to Graphics in Adobe Illustrator
A new tutorial video.
Plus: How to make your own vector & bitmap textures.
Tools used:
- Adobe Illustrator & Photoshop
- iPhone (camera)
- iPad Pro + Apple Pencil + Procreate App (to draw eagle)
- Plastisol Vintage T-Shirt Textures
Also mentioned in video:
Plastisol Cracked T-Shirt Ink Textures
Make your t-shirt designs look washed & worn with Plastisol Textures for Photoshop and Illustrator!

What is Plastisol, and what does it have to do with Vintage T-Shirts??
Plastisol Ink is a type of Screen Printing Ink that was first used to screen T-Shirts in the 1970's. When you look at Vintage Clothing, it's the ink that cracks and flakes over time as the t-shirt gets washed, stretched out, and worn to too many Def Leppard concerts.
Plastisol is why real Thrift Shop T-Shirts look Vintage!

How easy is it to add vintage texture to your own designs? Have a look at the tutorial videos.
PHOTOSHOP PSD: The most versatile format. Power users can easily go in and adjust the textures to their liking.
BITMAP TIFF: Use the "Opacity Mask" method (shown in the Plastisol 2 tutorial) to knock transparent texture through your raster & vector designs in Adobe Illustrator (yes Illustrator)!
PHOTOSHOP BRUSH: Super easy to use. Just double-click on the .abr file and these brushes will load into your Photoshop Brushes Palette. Select a brush, and click to paint in your vintage texture!
So what's the difference between Plastisol 1 and Plastisol 2?
The short answer is Plastisol 1 Textures are FASTER. Plastisol 2 Textures are highly CUSTOMIZABLE.

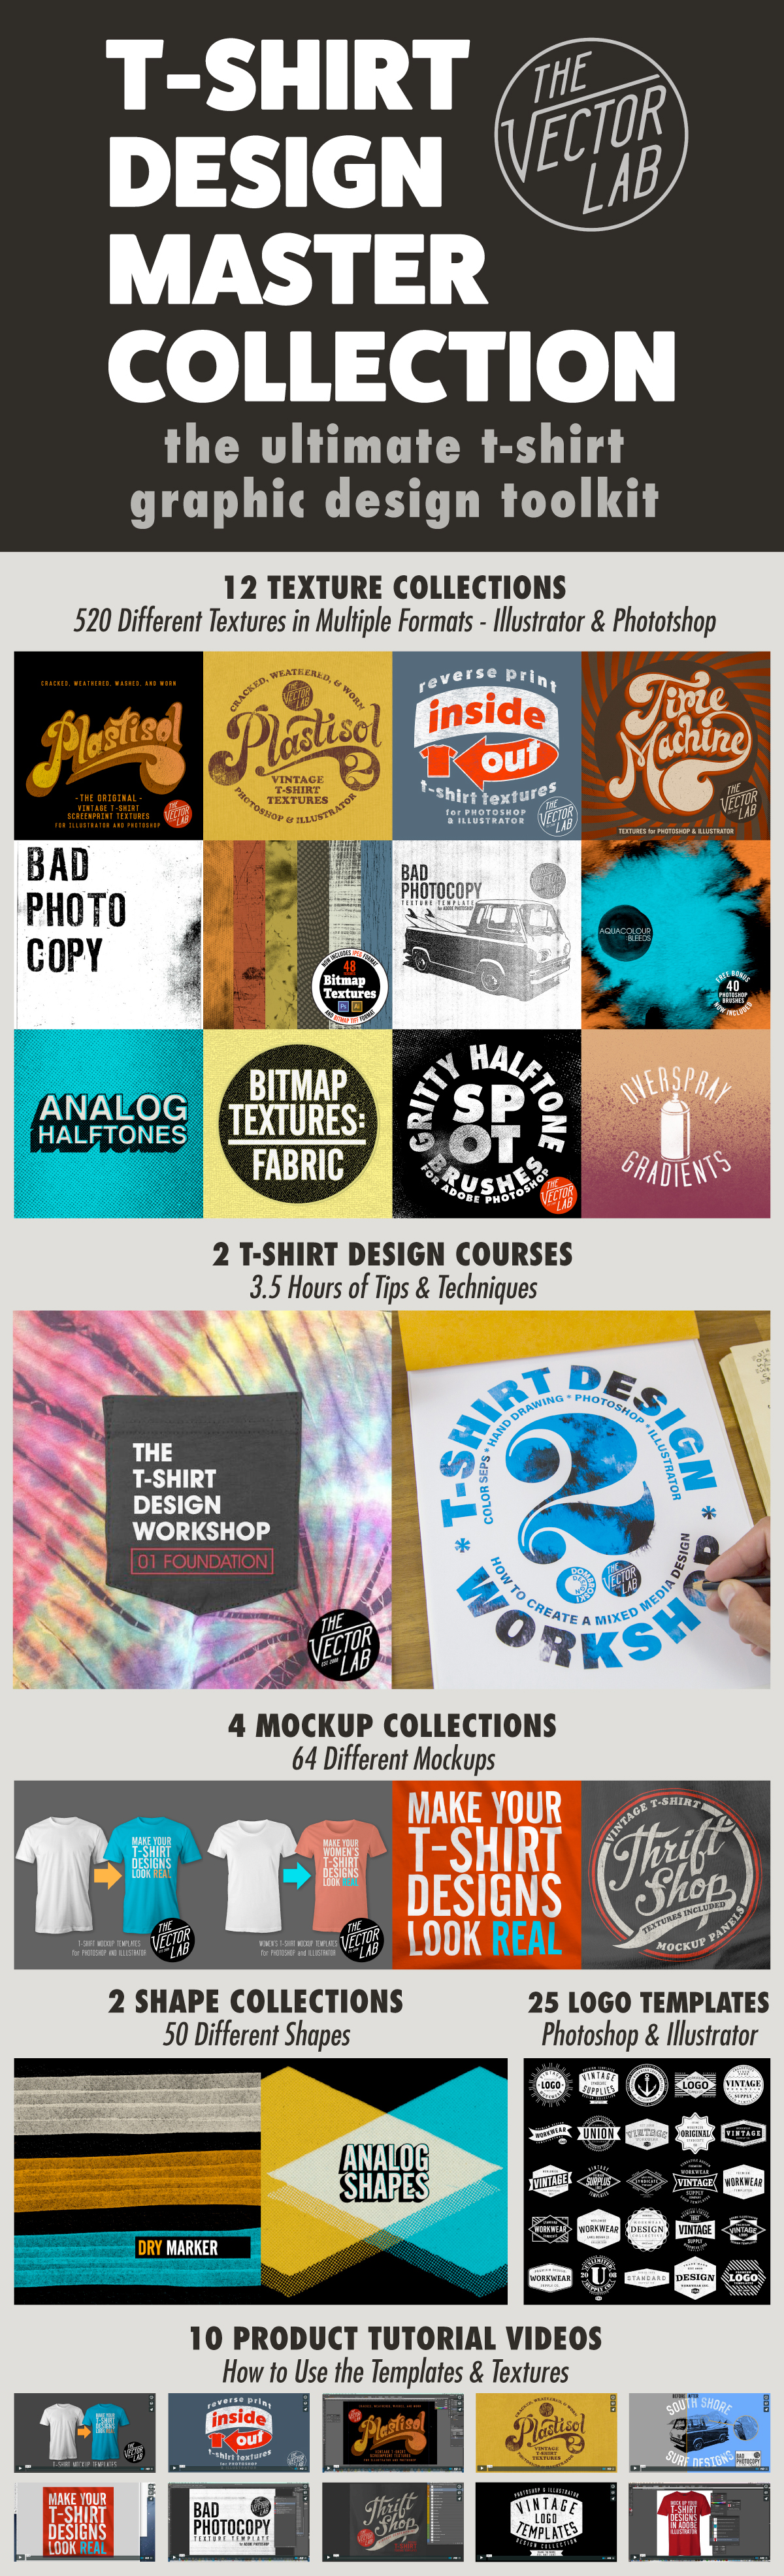
T-Shirt Design Master Collection
Here is a visual reference of all the resources included in T-Shirt Design Master Collection. At only $79, it is by far the most complete collection of textures, workshops, tutorials, textures, and templates ever offered on TheVectorLab.
Inside Out: Reverse Print T-Shirt Textures
Otherwise known as a "push through," a reverse print is when you flip a t-shirt inside out, and print on the inside of the shirt. Some of the ink shows through on the other side, and it results in a natural texture determined by the qualities of the fabric.

With "Inside Out" Reverse Print Textures, you can achieve the look of a real reverse screen print, without the headaches, ink thickness, and inconsistent results of traditional reverse printing.
What's included:
17 Textures: 4000 x 4000 pixels (equal to 13.33" x 13.33" @ 300 pixels per inch)
Every texture is in seamless repeat (tileable top-to-bottom and side-to-side), so you can use them to texture ANY size graphic.
These textures can be inverted (see video), essentially giving you 34 texture options!

Each of the 17 textures comes in the following formats:
• Photoshop Brush. Just double click on the .abr file to automatically load the brushes into Photoshop!
• Photoshop PSD with transparent backgrounds. (These files also include a hidden flattened layer for advanced users who want to adjust the "levels" of the lights and darks.)
• Bitmap Tiff. These files are ideal for screen print production & color separations using Illustrator because they have no greyscale; only black or white pixels. When viewed in Illustrator, Bitmap Tiff files have automatic transparency and can easily be assigned any color.
Plastisol 2 Vintage T-Shirt Cracked Ink Textures
Make your t-shirt designs look vintage with “Plastisol 2” cracked ink textures.
Plastisol 2 textures have SUBTLE EDGES, giving designers precise control of where to place the textures onto graphics.
Plastisol Ink is a type of Screen Printing Ink that was first used to screen T-Shirts in the 1970's. When you look at Vintage Clothing, it's the ink that cracks and flakes over time as the t-shirt gets washed, stretched out, and worn to too many Def Leppard concerts.

Plastisol is why real Thrift Shop T-Shirts look Vintage!
These 30 SUBTLE EDGE textures were created from 600 DPI scans of real vintage t-shirt graphics. The smallest texture is 625 x 406 pixels and the largest texture is 3357 x 3374 pixels.
Each of the 30 textures comes in the following formats:
• Photoshop Brush. Just double click on the .abr file to automatically load the brushes into Photoshop!
• Photoshop PSD with transparent backgrounds. (These files also include a hidden flattened layer for advanced users who want to adjust the "levels" of the lights and darks.)
• Bitmap Tiff. These files are ideal for screen print production & color separations using Illustrator because they have no greyscale; only black or white pixels. When viewed in Illustrator, Bitmap Tiff files have automatic transparency and can easily be assigned any color.

Also included is the Free Bonus Fabric Mockup Panel + instructions mentioned in the video above.
3 ways to get Vintage Cracked Ink Texture for T-Shirt Graphics
As a t-shirt designer there are 3 ways to get a vintage cracked ink look for your graphics like this:

- Print a t-shirt. Repeatedly wash & wear the shirt for 10 years.
- Use a crackle ink to print your design. It's good to give it a wash before selling so that the cracks will become more visible.
- Use the "Plastisol" collection of Photoshop Brushes and Bitmap Textures to add a consistent & reliable vintage look to your designs.
--
You might enjoy the Plastisol Textures Collection because 10 years is a long time to wait for t-shirt ink.
Free Textures over the Weekend
Hi there!
This past weekend, I sent out a free download of 15 Paper Textures for all subscribers to TheVectorLab's email newsletter.

If you missed the email, you can still get them as part of Graphic Design Launch Kit, by signing up for my newsletter.
A collection of 15 stained, crinkled, and distressed paper images. These are pixel-based (not vector) high resolution jpeg files: 2400 x 3500 pixels. Great for backgrounds. Use these by placing them in Photoshop or Illustrator as a multiply, screen, overlay, or darken layer on top of your design to create a natural distressed look.
If you want to convert these textures to Photoshop Brushes, it's easy:
Plastisol: Cracked Ink Textures for T-Shirt Designs
How do graphic designers get a vintage cracked ink look for their t-shirt designs?
It starts with Plastisol Ink.
Plastisol Ink is a type of Screen Printing Ink that was first used to screen T-Shirts in the 1970's. When you look at Vintage Clothing, it's the ink that cracks and flakes over time as the t-shirt gets washed, stretched out, and worn to too many Def Leppard concerts.
I've wandered through thrift shops, vintage clothing stores, and flea markets to gather only the best t-shirt specimens. These t-shirts with aged, worn, and washed cracked ink were then scanned into the computer. The scanned images have been turned into a collection of textures (bitmaps, JPEGs and Photoshop Brushes) that you can use to make your own t-shirt designs look vintage.
This collection of textures has been named "Plastisol"

This collection has 10 different 'base' textures, each with a Light, Medium, and Dark version. The "Dark" textures are the most beat-up, vintage, and abused. The "Light" textures have less weathering or "distress."
Each of these 30 Textures comes in the following formats:
• Medium-Resolution Photoshop Brushes (1500 x 1500 pixels - for ease of use and web-oriented graphics)
• High-Resolution Photoshop Brushes (2500 x 2500 pixels - maximum brush size for older versions of Photoshop)
• High-Resolution Photoshop Brushes (3000 x 3000 pixels - for real t-shirt graphic production or high-res graphics)
• Photoshop PSD (3000 x 3000 pixels - flattened greyscale files)
• Bitmap Tiff (3000 x 3000 pixels - these files are the ones you use in Illustrator)
(Please note, there are no vector files in this collection. Use the Bitmap Tiffs in Illustrator for much more detailed texture that won't bog your computer down).
My favorite versions are the BITMAP TIFF files and the PHOTOSHOP BRUSHES!
BITMAP TIFF: The white areas in these textures will be transparent when you place them into your Illustrator files (yes Illustrator!) on top of your vector graphics. Color these the same as your background, so it looks like the background is coming through your graphic. This method of adding texture is an old-school trick used by all the veteran t-shirt designers out there.
PHOTOSHOP BRUSH: What can I say... these are super easy to use. Just double-click on the .abr file and these brushes will load into your Photoshop Brushes Palette. Select a brush, and click to paint in your vintage texture!
Preparing T-Shirt Designs with Texture and Transparency for DTG Printing
If you are printing t-shirts Direct to Garment (DTG) with an online service like Spreadshirt, TeeSpring, or UberPrints here are some things to know when preparing your art files.

Unless your design is a solid rectangle of ink defined by the dimensions of your image file, it will best be prepared with a transparent background. An art file with transparency will also be required if your design has a distress texture (like Plastisol, Time Machine Textures, or Bitmap Textures) that knocks back to shirt fabric color. Otherwise, you may get back a t-shirt with printed ink texture.
Many of these companies accept only a few limited file types. The most universal solution is to send them a PNG file with a transparent background (and transparent texture). A transparent PNG can easily be exported out of Photoshop or Illustrator.
Method 1: Photoshop (Simple)
If you have a flattened one color image, here’s one way you can remove a white background color.
To knock distress texture through your design, the simplest method would be to erase the texture out of your design if you have any Photoshop Brush textures like the ones mentioned above. Just double click the brush files to load them into Photoshop. Select your eraser tool. Select one of the texture brushes from the brush panel. Size your brush using the [ ] bracket keys, and click to erase out the texture. Save your file as a PNG.
Method 2: Layered Photoshop File (Non-destructive technique)
If your Photoshop file is layered, you can group all the layers that you want textured. Highlight that layer group in your layers panel and go to Layer >> Layer Mask >> Reveal All. With that layer mask highlighted in your layers panel, simply paint in black with one of the texture brushes to knock texture through your design.
To see how this method works, skip ahead in this video to the 4:00 mark:
This method is good because using the layer mask makes it nondestructive to your art. Just hide the background layer (if there is one) and save a copy of your file as a PNG and upload it to your t-shirt print vendor.
Method 3: Illustrator Opacity Mask
If you have a background-less design in Illustrator, you will have no problem sending a vector file to be printed. However, if your design includes bitmap or vector textures that go back to t-shirt fabric color, then you will want to use this Opacity Mask method.
Export your art as a PNG anywhere between 150-300 DPI at the printed dimensions that you want. Your exported image will no longer be a vector file, but that's completely fine.
Tips:
- When you go File > Export, have the transparency box clicked so your textures become transparent to the background color.
- When you upload your files, make sure to add your desired dimensions in the notes. Even if, for example, your PNG file is saved as 11" x 6" @ 300 DPI, it doesn't mean the person printing your image will know to print it 11" x 6" on the shirt. I've have found that unless you specify, your t-shirt design will often come back bigger or smaller than you wanted.
- While you are at it, you might as well specify the placement of your graphic on the shirt. For instance, you could include a note that says "Please place graphic 3.75" beneath collar seam."
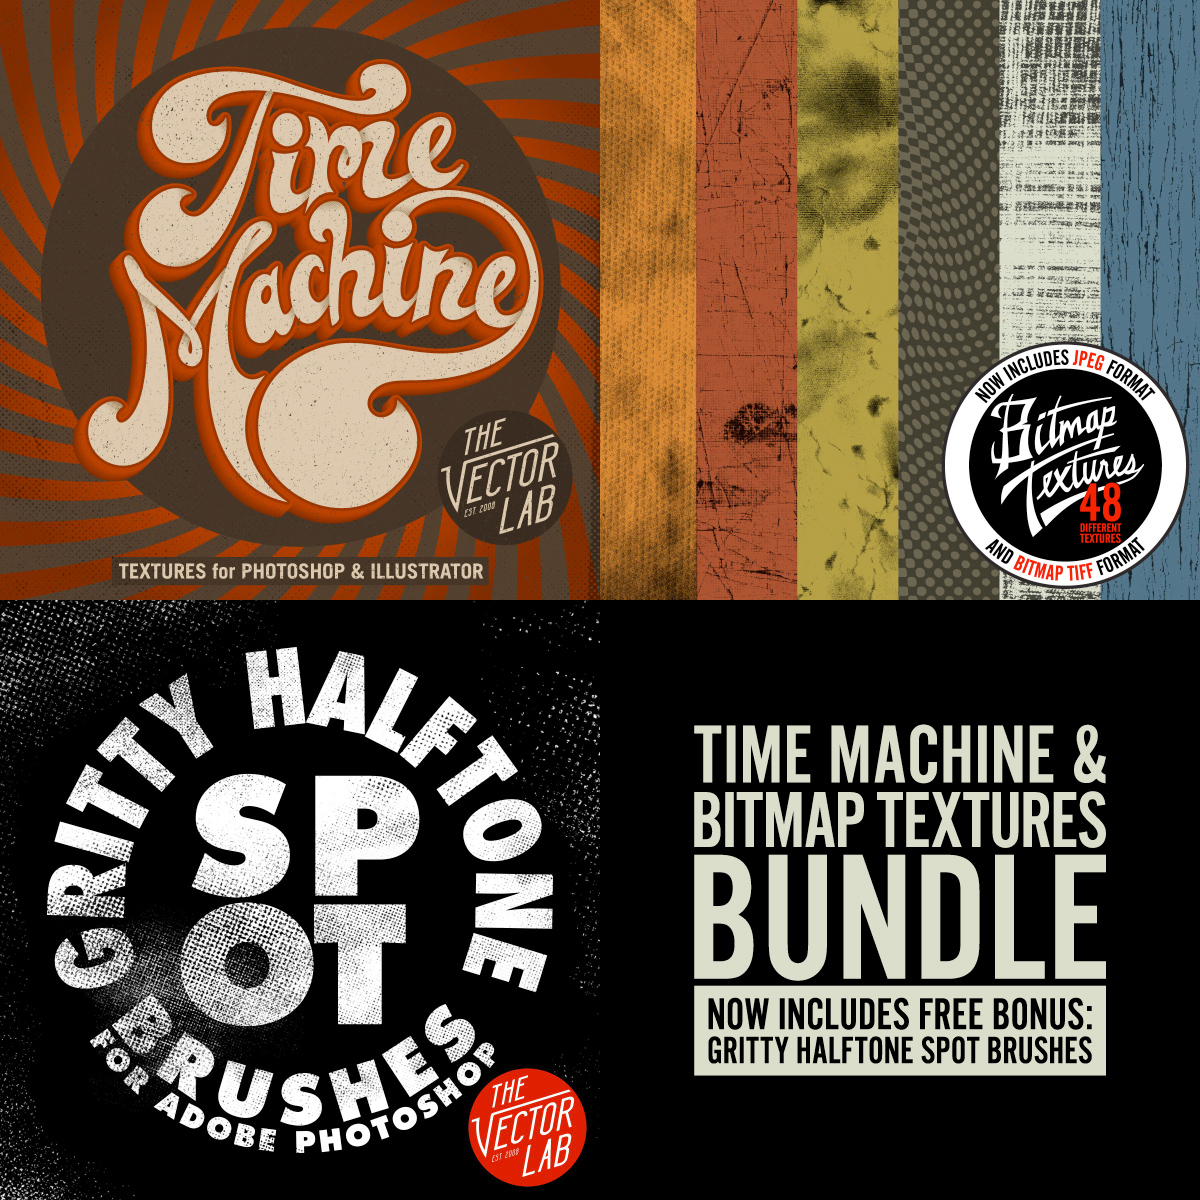
Halftone Spot Brushes
Today I am announcing two new items.
The first is a brand new collection of 15 halftone texture brushes for Adobe Photoshop. It's called Gritty Halftone Spot Brushes.
They fade out with no hard edges, making them perfect for adding subtle gritty texture to your type, logos, and illustrations.
Go here to see Gritty Halftone Spot Brushes.
Even better, at the bottom of this post I will tell you how you can get Gritty Halftone Spot Brushes as a Free Bonus.

The second new item that I have for you today is a bundle of some of the best textures available on TheVectorLab.
This Time Machine & Bitmap Textures Bundle includes a wide variety of 88 textures for Photoshop and Illustrator in the following styles:
Analog Halftones (imperfect halftones from vintage magazines)
Bad Photocopy
Vintage Book Cover
Fabric Textures
Garage Textures
Grit
Plastisol (cracked t-shirt ink)
Time Machine (vintage texture)
Order Time Machine & Bitmap Textures Bundle today, and get the brand new Gritty Halftone Spot Brushes for Photoshop as a Free Bonus!